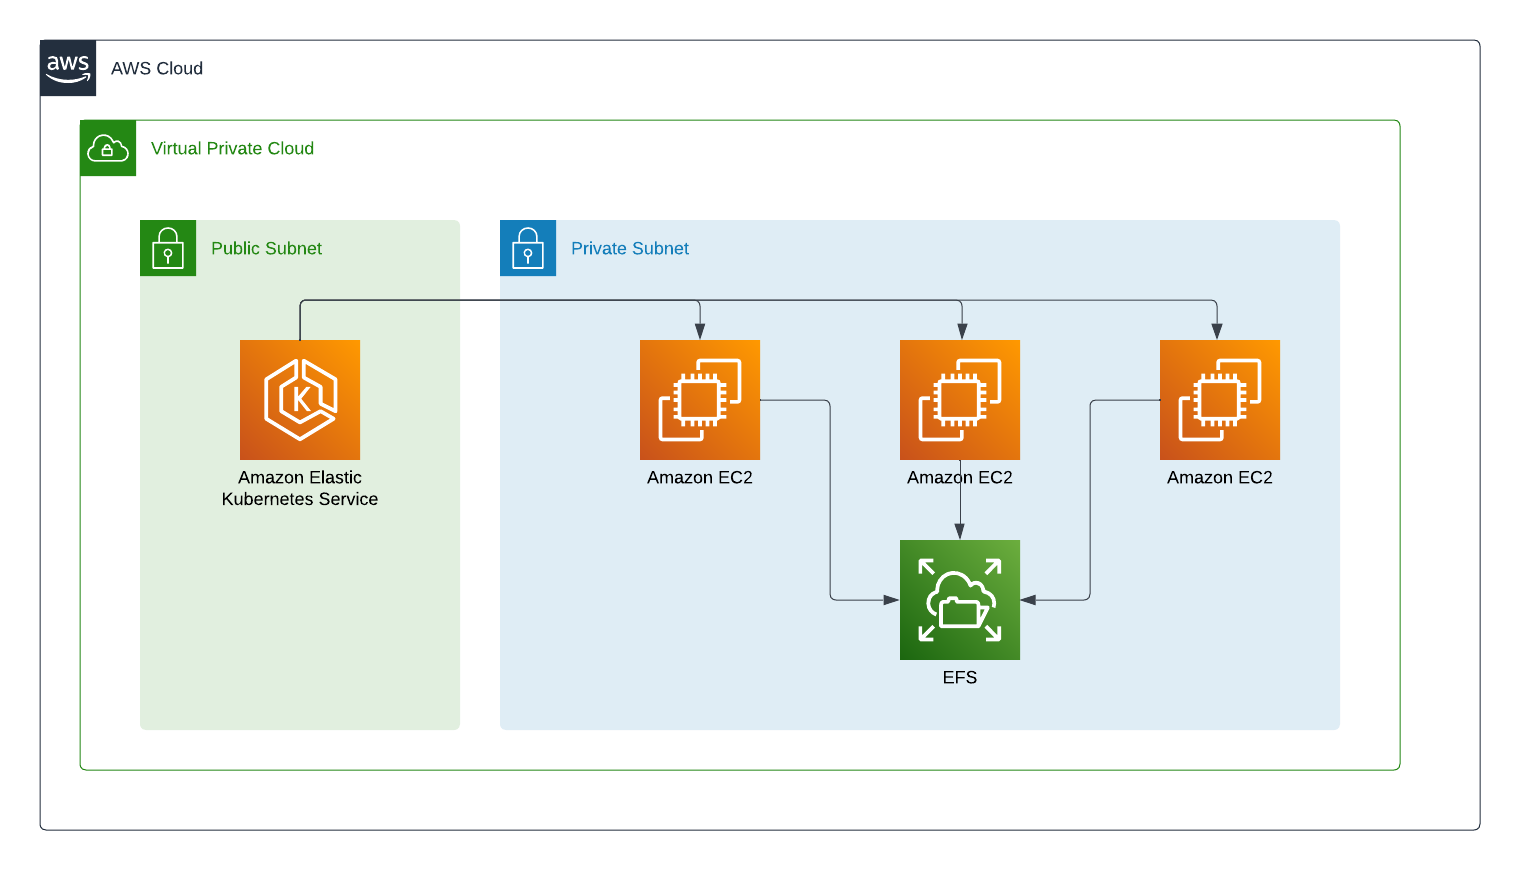
Using AWS EKS is great for large-scale services but what happens when you need a shared filesystem? Some applications need to share a filesystem to work properly so you need to set up some volumes. If you only need one node to be able to use a volume at once then an EBS is ideal. For more complex needs with lots of reads and writes from different nodes you need EFS.
What is EFS
EFS, also known as the Elastic File System, is a NFS based service within AWS. It allows multiple EC2 instances to share the same mounted directories within the file system at the same time. It is different from EBS because EBS is basically a persistent drive. You can use it to save files, turn off the EC2 instance and then add the EBS to a new server. That’s great for ensuring the files are safe but it does not support multiple instnaces using the files at the same time. For that you need EFS.
Setting up EFS on Kubernetes
If you have seen my previous AWS Kubernetes articles on setting up load balancers you will have seen the Terraform module used to create the cluster.
1
2
3
4
5
6
7
8
9
10
11
12
13
14
15
16
17
18
19
20
21
22
23
24
25
26
27
28
29
30
31
32
33
34
35
36
37
38
39
40
41
42
43
44
45
46
47
48
49
50
module "eks" {
  source  = "terraform-aws-modules/eks/aws"
  version = "~> 19.0"

  cluster_name    = local.project_key
  cluster_version = "1.24"

  cluster_endpoint_public_access  = true

  cluster_addons = {
    coredns = {
      most_recent = true
    }
    kube-proxy = {
      most_recent = true
    }
    vpc-cni = {
      most_recent = true
    }
  }

  vpc_id                   = module.vpc.vpc_id
  subnet_ids               = module.vpc.private_subnets
  control_plane_subnet_ids = module.vpc.public_subnets

  self_managed_node_group_defaults = {
    instance_type                          = "m6i.large"
    iam_role_additional_policies = {
    }
  }

  eks_managed_node_group_defaults = {
    instance_types = [var.instance_size]
    vpc_security_group_ids = [aws_security_group.eks.id]
  }

  eks_managed_node_groups = {
    green = {
      min_size     = 1
      max_size     = 10
      desired_size = 1

      instance_types = [var.instance_size]
      capacity_type  = "SPOT"

      tags = local.default_tags
    }
  }

}
To add EFS we first need to add a security group:
1
2
3
4
5
6
7
8
9
10
11
12
13
resource "aws_security_group" "efs" {
  name        = "${var.env} efs"
  description = "Allow traffic"
  vpc_id      = module.vpc.vpc_id

  ingress {
    description      = "nfs"
    from_port        = 2049
    to_port          = 2049
    protocol         = "TCP"
    cidr_blocks      = [module.vpc.vpc_cidr_block]
  }
}
And add it to the cluster by finding the eks_managed_node_group_defaults in the EKS module above.
1
2
3
4
  eks_managed_node_group_defaults = {
    instance_types = [var.instance_size]
    vpc_security_group_ids = [aws_security_group.eks.id]
  }
Next you need to grant IAM roles to the nodes to use EFS.
1
2
3
4
5
6
7
8
9
10
11
12
13
14
15
16
17
18
19
20
21
22
23
24
25
resource "aws_iam_policy" "node_efs_policy" {
  name        = "eks_node_efs-${var.env}"
  path        = "/"
  description = "Policy for EFKS nodes to use EFS"

  policy = jsonencode({
    "Statement": [
        {
            "Action": [
                "elasticfilesystem:DescribeMountTargets",
                "elasticfilesystem:DescribeFileSystems",
                "elasticfilesystem:DescribeAccessPoints",
                "elasticfilesystem:CreateAccessPoint",
                "elasticfilesystem:DeleteAccessPoint",
                "ec2:DescribeAvailabilityZones"
            ],
            "Effect": "Allow",
            "Resource": "*",
            "Sid": ""
        }
    ],
    "Version": "2012-10-17"
}
  )
}
Now you can create the EFS itself
1
2
3
4
5
6
7
8
9
10
11
resource "aws_efs_file_system" "kube" {
  creation_token = "eks-efs"
}

resource "aws_efs_mount_target" "mount" {
    file_system_id = aws_efs_file_system.kube.id
    subnet_id = each.key
    for_each = toset(module.vpc.private_subnets )
    security_groups = [aws_security_group.efs.id]
}
Notice I am using a module called module.vpc to get the VPC details. If you want to see how that works check out the Terraform VPC documentation.
Adding the EFS controller
Now that we have EFS running we need to tell Kubernetes about it. AWS provide manifests to set this up.
1
kubectl kustomize "github.com/kubernetes-sigs/aws-efs-csi-driver/deploy/kubernetes/overlays/stable/?ref=release-1.X" > public-ecr-driver.yaml
You will need to set the release number to the latest version. In my case that is 1.5.3 but you can find the latest on the (EFS Driver Github)[https://github.com/kubernetes-sigs/aws-efs-csi-driver/releases] page.
This will give you a large Kubernetes manifest. Open it up and find the Service Account named efs-csi-controller-sa. You can add an annotation role arn that you created above, eks.amazonaws.com/role-arn: <arn>. Now you can apply with kubectl apply -f public-ecr-driver.yaml.
Finally create the storage class and the volumes.
1
2
3
4
5
6
7
8
9
10
11
12
13
14
15
16
17
18
19
20
21
22
23
24
25
26
apiVersion: v1
kind: PersistentVolume
metadata:
  name: efs-pv
spec:
  capacity:
    storage: 10Gi
  volumeMode: Filesystem
  accessModes:
    - ReadWriteMany
  persistentVolumeReclaimPolicy: Retain
  storageClassName: efs-sc
  csi:
    driver: efs.csi.aws.com
    volumeHandle: <Your filesystem id from EFS, normally starting with fs->

---
kind: StorageClass
apiVersion: storage.k8s.io/v1
metadata:
  name: efs-sc
provisioner: efs.csi.aws.com
parameters:
  provisioningMode: efs-ap
  fileSystemId: <Your filesystem id from EFS, normally starting with fs->
  directoryPerms: "777"
The volume is not available to use.
Using the volume
To use the new EFS volume you can create a persistent volume claim and use it with multiple containers.
1
2
3
4
5
6
7
8
9
10
11
12
13
14
15
16
17
18
19
20
21
22
23
24
25
26
27
28
29
30
31
32
33
34
35
36
37
38
apiVersion: v1
kind: PersistentVolumeClaim
metadata:
  name: myvolume
spec:
  accessModes:
    - ReadWriteMany
  storageClassName: efs-sc
  resources:
    requests:
      storage: 5Gi
---
apiVersion: apps/v1
kind: Deployment
metadata:
  name: website
spec:
  replicas: 2
  selector:
    matchLabels:
      app: website
  template:
    metadata:
      labels:
        app: website
    spec:
      containers:
        - name: website
          image: wordpress:latest
          volumeMounts:
            - name: myvolume
              mountPath: /var/www/html/wp-content/uploads
              subPath: uploads

      volumes:
        - name: myvolume
          persistentVolumeClaim:
              claimName: myvolume
Summary
EFS is a powerful tool for those using AWS and Kubernetes together. The documentation could be better, but by using the steps here, you should be able to get shared volumes up and running quickly.
